awsのEC2でswap領域を指定する際のベストプラクティス
awsのEC2では、一部のインスタンスタイプを除いてswap領域が付いていません。
swap領域を設定する方法としては、swap領域用のイメージをファイルで作成してswaponする方法があります。
今回紹介する方法は、awsナイズした方法で、ボリュームを作成してswapとしてマウントさせる方法になります。
通常はストレージとしてのボリュームはボリュームタイプを標準のgp2に設定されていると思うので、それよりも早いプロビジョンドIOPS SSDというボリュームタイプでswapを作成します。
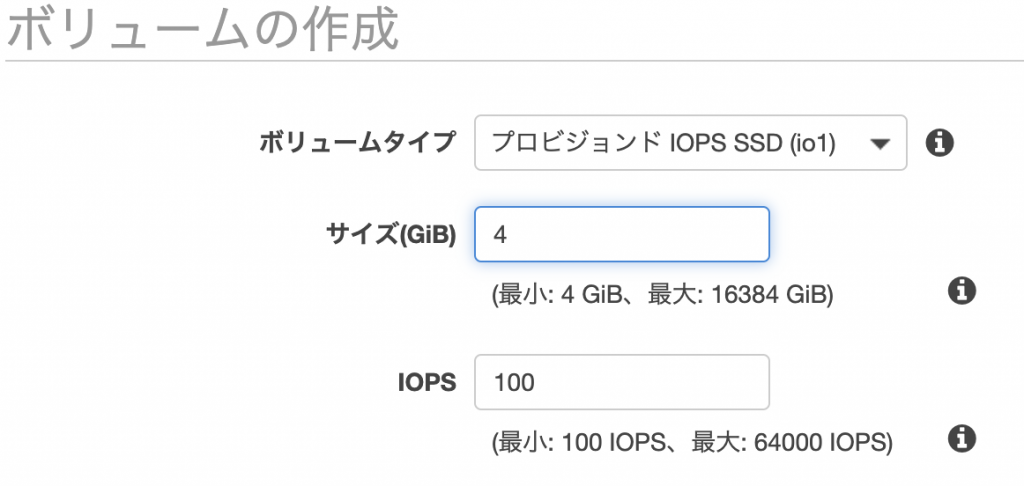
そうすることで、swapが発生したときの性能も大きく落とすこと無くサービスを稼働させられるようになります。
ただ、最低サイズが4GBからとなります。
作成したボリュームをマウントさせたいEC2インスタンスにアタッチしたら
確認してみます。
ubuntu@host:~$ sudo lsblk
NAME        MAJ:MIN RM SIZE RO TYPE MOUNTPOINT
loop0         7:0    0  91M  1 loop /snap/core/6350
loop1         7:1    0  18M  1 loop /snap/amazon-ssm-agent/930
nvme0n1     259:0    0  30G  0 disk
└─nvme0n1p1 259:1    0  30G  0 part /
nvme1n1     259:2    0   4G  0 disk
領域をswapとしてフォーマットします。
root@host:~# fdisk /dev/nvme1n1

Welcome to fdisk (util-linux 2.31.1).
Changes will remain in memory only, until you decide to write them.
Be careful before using the write command.

Device does not contain a recognized partition table.
Created a new DOS disklabel with disk identifier 0x50550c3b.

Command (m for help): p
Disk /dev/nvme1n1: 4 GiB, 4294967296 bytes, 8388608 sectors
Units: sectors of 1 * 512 = 512 bytes
Sector size (logical/physical): 512 bytes / 512 bytes
I/O size (minimum/optimal): 512 bytes / 512 bytes
Disklabel type: dos
Disk identifier: 0x50550c3b

Command (m for help): n
Partition type
   p   primary (0 primary, 0 extended, 4 free)
   e   extended (container for logical partitions)
Select (default p): p
Partition number (1-4, default 1):
First sector (2048-8388607, default 2048):
Last sector, +sectors or +size{K,M,G,T,P} (2048-8388607, default 8388607):

Created a new partition 1 of type 'Linux' and of size 4 GiB.

Command (m for help): p
Disk /dev/nvme1n1: 4 GiB, 4294967296 bytes, 8388608 sectors
Units: sectors of 1 * 512 = 512 bytes
Sector size (logical/physical): 512 bytes / 512 bytes
I/O size (minimum/optimal): 512 bytes / 512 bytes
Disklabel type: dos
Disk identifier: 0x50550c3b

Device         Boot Start     End Sectors Size Id Type
/dev/nvme1n1p1       2048 8388607 8386560   4G 83 Linux

Command (m for help): t
Selected partition 1
Hex code (type L to list all codes): 82
Changed type of partition 'Linux' to 'Linux swap / Solaris'.

Command (m for help): p
Disk /dev/nvme1n1: 4 GiB, 4294967296 bytes, 8388608 sectors
Units: sectors of 1 * 512 = 512 bytes
Sector size (logical/physical): 512 bytes / 512 bytes
I/O size (minimum/optimal): 512 bytes / 512 bytes
Disklabel type: dos
Disk identifier: 0x50550c3b

Device         Boot Start     End Sectors Size Id Type
/dev/nvme1n1p1       2048 8388607 8386560   4G 82 Linux swap / Solaris

Command (m for help): w
The partition table has been altered.
Calling ioctl() to re-read partition table.
Syncing disks.
swapの作成
mkswap /dev/[マウント名]終わったら/etc/fstabに設定を書きます。
この時、通常のlinux等では/dev/dbfなどのデバイスパスでマウントさせることになりますが、最近のEC2はNITRO世代と言って(t3.*)などのインスタンスは/dev配下のマウント名が変わっています。
しかも、このマウント名が常に固定では無いので、インスタンスの再起動などをすると、root fsはマウントされて起動するのにswapが外れている、ということがよく起こります。
これを解決するため
blkidというコマンドで表示されるドライブのなかからswapの物を特定し
uuidを使用して/etc/fstabに設定していきます。
# blkid
ubuntu@host:~$ sudo blkid /dev/nvme0n1p1: LABEL="cloudimg-rootfs" UUID="aaaaaaaa-bbbb-cccc-dddd-608fd9820d95″ TYPE="ext4″ PARTUUID="df3095e2-01″ /dev/nvme1n1p1: UUID="aaaaaaaa-bbbb-cccc-dddd-1b715a9158cf" TYPE="swap" PARTUUID="50550c3b-01″このような感じに表示されると思います。
TYPE=swapというものがあるので、そのUUIDを使って定義します。
/etc/fstabを以下のように編集(追記)します。
UUID="aaaaaaaa-bbbb-cccc-dddd-1b715a9158cf" swap swap defaults 0 0
これで、サーバを再起動しても常にswapがマウントされるようになります。